Showing posts with label Totorial. Show all posts

Samsung Galaxy with Android SDK on Ubuntu

When new Ubuntu Karmic came out I decided to install it from scratch instead of upgrading from Jaunty. Id didn’t take much time to migrate all my data and necessary software. However Android SDK made me some troubles as I forgot all the tricks I had to do to make it working and since I had to follow the same path again I decided to write it down in case me or anyone alse need it again.
Let’s start from the beginning:


  • download Linux version of SDK from developer.android.com
  • unpack it to a folder of your choice
  • launch android program from android-sdk-linux_86/tools subdirectory; make sure you’re using Sun Java virtual machine, if not then I suggest to:
    • install Sun JDK if you don’t have one yet:

      sudo apt-get install java-6-sun

    • setup command line environment and run android tool:

      export JAVA_HOME=/usr/lib/jvm/java-6-sun
      export PATH=$JAVA_HOME/jre/bin:$PATH
      /tools/android

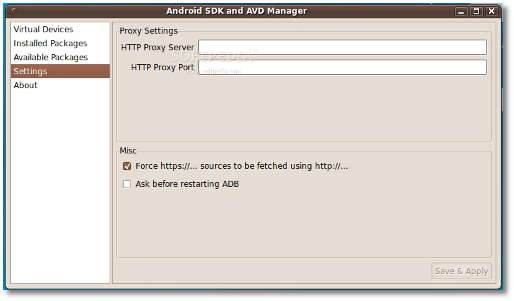
  • you may need to select Force https://… sources to be fetched using http://…” option on the Settings page in case of errors when downloading packages list or packages
  • on the Available Packages page select and install packages you need
  • because of the bug in adb affecting Samsung Galaxy users, replace /tools/adb program with patched one
  • create /etc/udev/rules.d/51-samsung-galaxy.rule file with the following content:

    SUBSYSTEM==”usb”, SYSFS{idVendor}==”04e8″, MODE=”0666″

  • reload udev rules:

    sudo /etc/init.d/udev reload

After all that you should be able to connect to your Samsung Galaxy with adb:

~/dev/android-sdk-linux_86/tools$ ./adb devices
List of devices attached
I7500fIf0cVtIYi device

or with ddms (Dalvik Debug Monitor, it also may not work with non-Sun Java) :


More

ADB On Linux -> Ubuntu

1. Plug-in your device then exec command ‘lsusb’ then you will see the list of current usb devices

Bus 003 Device 023: ID 18d1:d00d

We will see a device is appeared when it plug-in and disappeared when it plug-out. That device is we wanted and take my environment as an example it is located at line 1, “Bus 003 Device 023: ID 18d1:d00d”, without device provider.

2. Login as root and create this file: /etc/udev/rules.d/50-android.rules

For Gusty/Hardy, edit the file to read:

SUBSYSTEM==”usb”, SYSFS(idVendor)==”18d1“, MODE=”0666″

For Dapper, edit the file to read:

SUBSYSTEM==”usb_device”, SYSFS(idVendor)==”18d1“, MODE=”0666″


Fix for ADB in Ubuntu 9.10 (32bit)

I figured I would post this fix just in case anyone was having problems w/ adb in Ubuntu like I was having. I am no Linux Guru, if there is a better way of fixing this problem let me know

After Rooting the phone and installing Android SDK, when trying to run adb I would get this:

$ adb devices
List of devices attached
???????????? no permissions

I fixed this by:

Code:
sudo gedit /etc/udev/rules.d/10-motorola-droid.rules
In the blank area copy and paste this, inserting your user name in place of :
Code:
SUBSYSTEMS=="usb", ATTRS{idVendor}=="22b8", ATTRS{idProduct} =="41db", MODE="0600", OWNER=""
Save and Exit.

Restart the udev by:
Code:
sudo service udev restart
Restart adb:
Code:
adb kill-server
adb start-server
You should see the message:
* daemon not running. starting it now *
* daemon started successfully *

Now when you adb devices your phone should show.

More

Android Emulator On Ubuntu

When Google announced and released Android, back in October 2008, everyone knew that it would become the best operating system for mobile devices. Not only is Android open source, but it also comes with a Software Development Kit, which offers the necessary APIs and utilities for developers to easily build powerful applications for Android-powered mobile devices. The following tutorial was created especially for those of you who want to test the Android platform and install various applications, on the popular Ubuntu operating system. OK, so let's get started... shall we?

Grab the Android SDK from Softpedia and save the file on your home folder.

Editor's note: The tutorial was rewritten for the new Android 2.0 or later, which provides a graphical user interface to setup a virtual device and the SD card. This makes everything a lot easier. No more command-line madness!

Step 1 - Installing the requirements

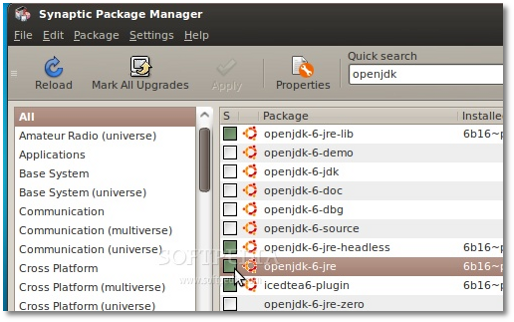
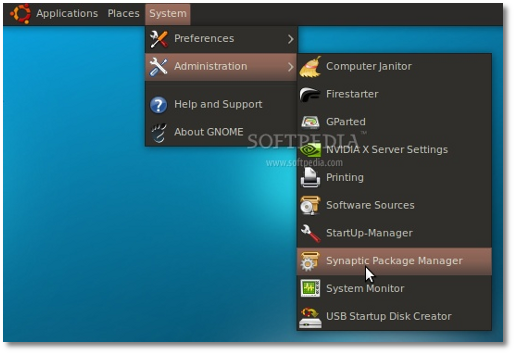
Until the download is over, make sure that you have Java installed and the 32-bit libraries (for the x86_64 users ONLY). If you don't have Java (or the 32-bit libraries), go to System -> Administration -> Synaptic Package Manager...

Review image

...search for openjdk and double-click on the openjdk-6-jre entry...

Review image

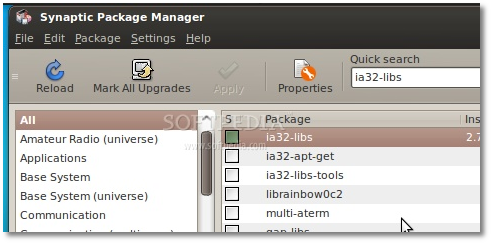
...then, search for ia32-libs (ONLY if you are on a x86_64 machine), and double-click on the ia32-libs entry...

Review image

Now, click the "Apply" button to install the packages. Wait for the packages to be installed and close Synaptic when the process is finished.

Step 2 - Android Setup

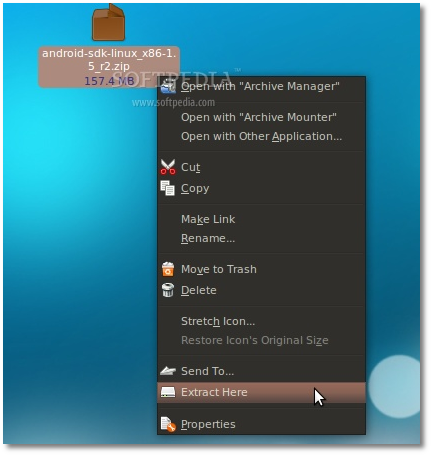
When the Android SDK download is over, right-click on the file and choose the "Extract Here..." option...

Review image

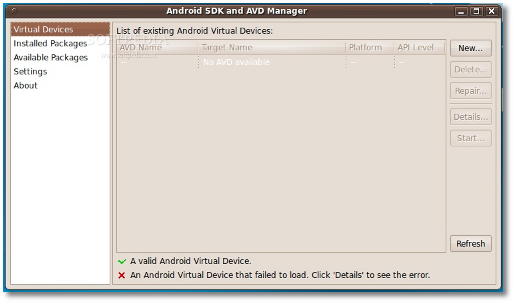
Enter the extracted folder, then enter the tools folder and double click the android file. Click on the "Run" button when you will be asked what you want to do, and the Android SDK and AVD Manager interface will appear...

Review image

Go to the "Settings" section and make sure you check the "Force https://..." box. Click the "Save & Apply" button....

Review image

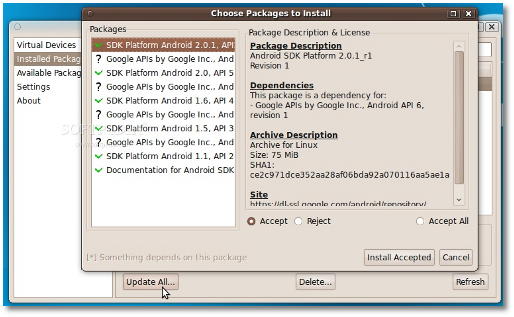
Now go to the "Installed Packages" section and click the "Update All" button. A window will appear with all the available updates. Click the "Install Accepted" button...

Review image

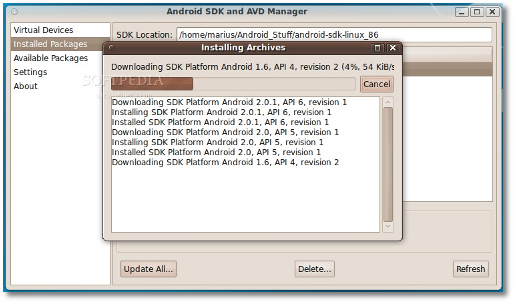
...and wait for the packages to be downloaded and installed. It will take a while if you have a slow bandwidth, so go see a movie or something until it finishes...

Review image

Close the update window when it's done and you will see all the installed SDKs in the "Installed Packages" section.

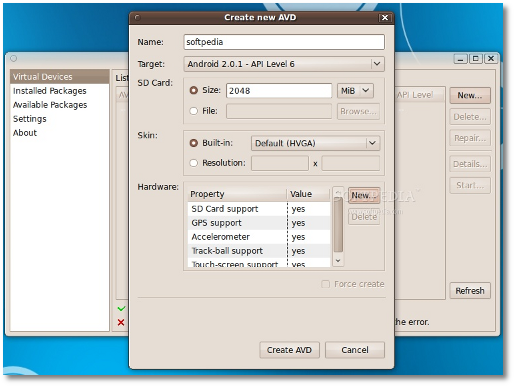
And now, let's create the virtual device. Go to the "Virtual Device" section and click the "New" button. In the new window do the following:

- put a name to the device;
- select a target (Android system);
- put the size for the SD Card;
- add the hardware you want have in the emulator.

It should look something like this...

Review image

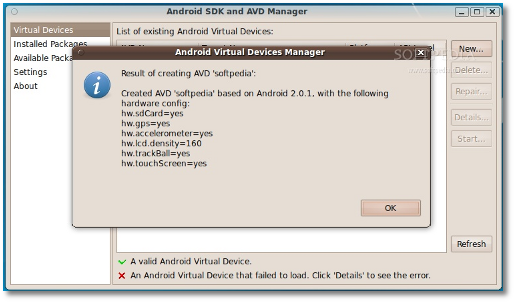
Click the "Create AVD" button when you're done setting up the virtual device and wait for it to finish. It takes about 1 minute, and you'll be notified by a pop-up...

Review image

Note: In the above setup, we've created a virtual device for Android 2.0.1 with a 2 GB SD card and the following hardware components: SD Card, GPS, Accelerometer, Track-ball and touch-screen.

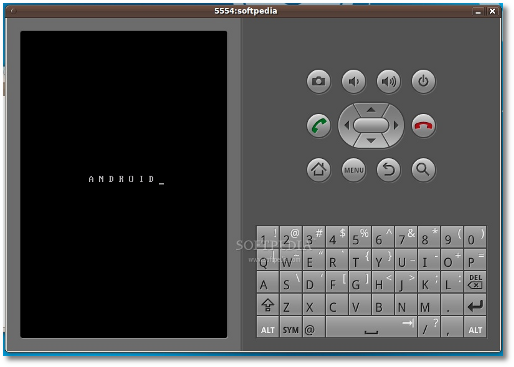
Now click the "Start" button, and the "Launch" button from the next dialog, and the emulator will start...

Review image

Review image

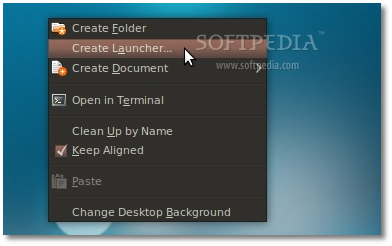
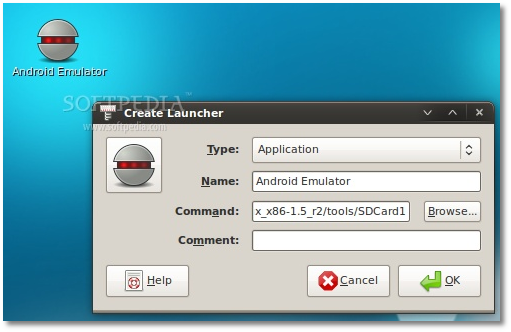
To make things a lot simpler let's create a desktop shortcut, so you won't have to open the terminal every time and type some command, in order to start the Android emulator. Therefore, right-click on your desktop and choose the "Create Launcher..." option...

Review image

In the Create Launcher window, type "Android Emulator" (without quotes) in the Name field, and paste the below line in the Command field. Optionally, you can also put a nice icon if you click the icon button on the left...

/home/YOURUSERNAME/android-sdk-linux_86/tools/emulator @softpedia

Review image

Note: Please replace YOURUSERNAME and the name of the Android Virtual Device (softpedia in our case) with your USERNAME and the name you gave to the virtual device. DO NOT REMOVE the @ sign.

Step 3 - Run applications in Android

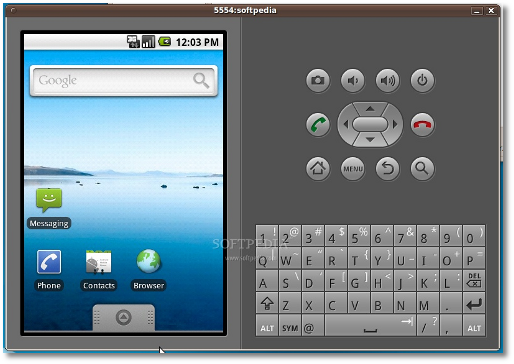
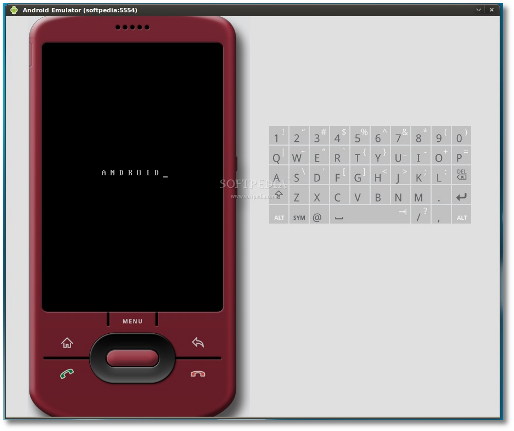
All you have to do now is double-click that desktop shortcut you've just created. The Android emulator will start. Wait for the operating system to load...

Review image

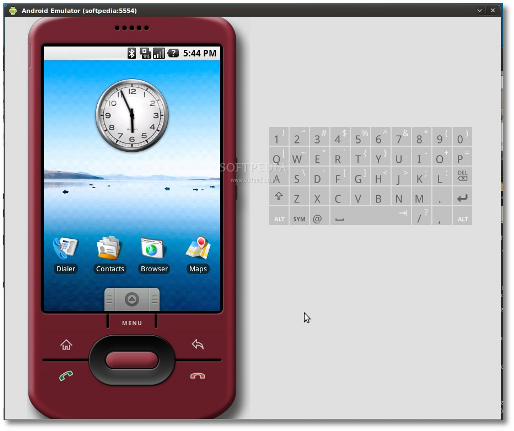
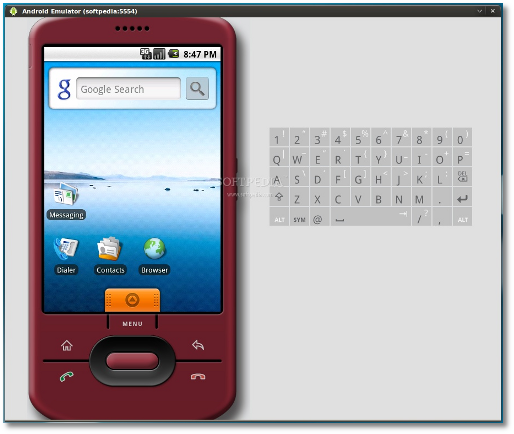
When the Android operating system has loaded, you can install and test applications. If you are used with the Android platform, you already know how to do that, but if this is your first time... follow the next instructions.

Review image
Android 1.1

Review image
Android 1.5

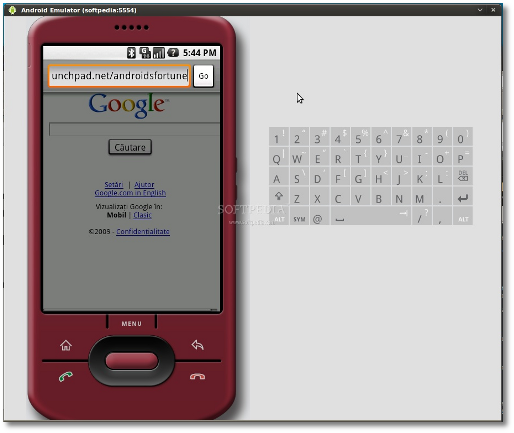
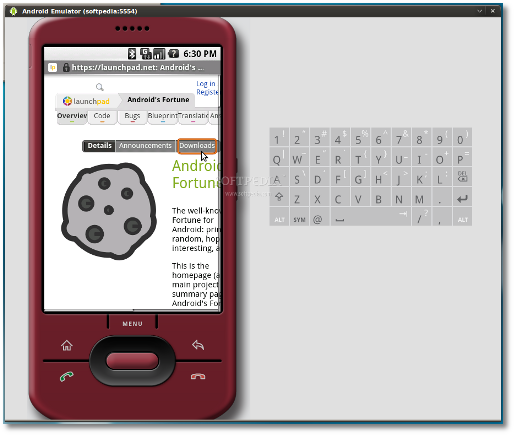
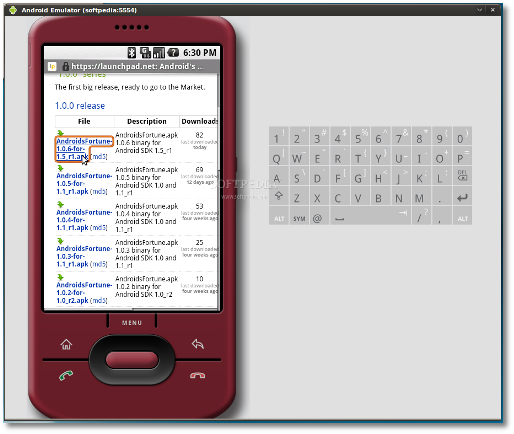
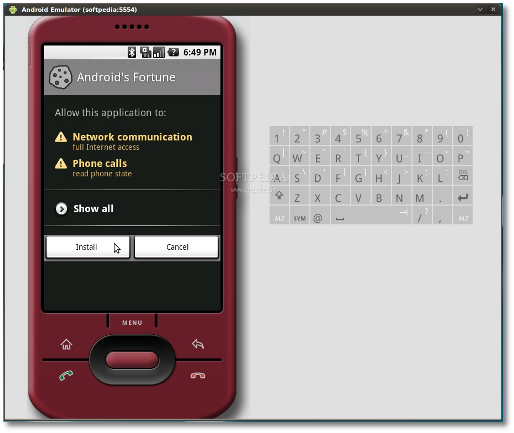
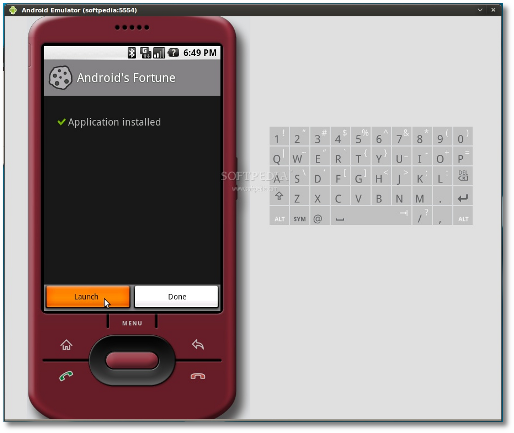
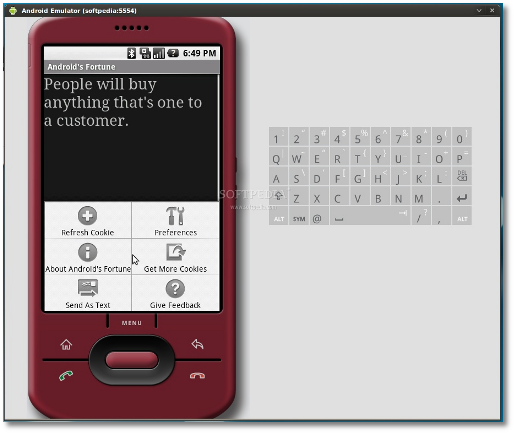
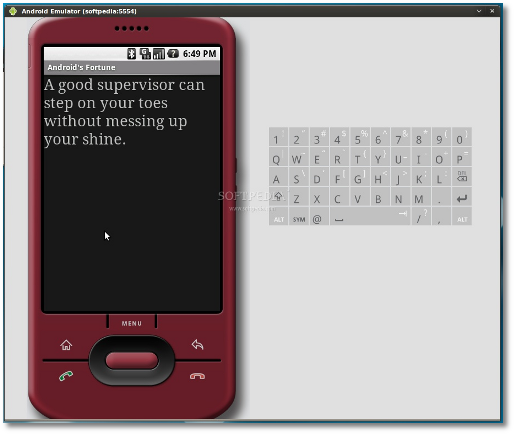
Click the Browser icon, wait for the browser to load and click Menu -> Go to URL. Enter the address from where you can download an Android application with the apk extension. For example, we've easily installed Android's Fortune from Launchpad...

Review  image

Review  image

Review  image

Review  image

Review  image

Review  image

Review  image

...all you have to do is follow the on-screen instructions!

Have fun, and do not hesitate to comment if you want to know more about Android, or if you're stuck somewhere in the tutorial.

More

App2sd Ready on i5700 spica

i will make this guide easiest
to update your firmware with LK2.xx

first make sure your devices is redy:

  1. At least you must have installed LK2.02 + update, any Android 2.1 firmware (it will be completely replaced by SamdroidMod)
  2. If you have had installed SamdroidMod firmware all your data must be saved, in other cases, device can have problems with booting (endless rebooting, or do not boot at all), to fix this enter Recovery, select Wipe → Wipe data/cache.
if not redy yet, then let us make it ready first.


2. put the file your allready download to odin like this one

4. then start flashing. this mean format your PDA memory.
during flashing proccess all button in oddin will be disabled for a minutes, wait untill all button enabled, this stage mean your PDA has beed formated.

5. put full-lwmod in odin as one package and chack one package as option and debug only in as debug option


6. then start flashing and wait 5 - 7 minutes.

if finished your system is LightweightMod v2.2

A new version of the mod, is now fully up to its name -

it contains a minimum applications set and has a very small amount of modifications.

Click image for larger version    Name: en-lw2.2-dsk1..png  Views: 185  Size: 73.1 KB  ID: 516Click image for larger version    Name: en-lw2.2-app1..png  Views: 202  Size: 31.8 KB  ID: 512Click image for larger version    Name: lwmod2.1-htcime-e.png  Views: 189  Size: 35.0 KB  ID: 458Click image for larger version    Name: ufmod2.1-FM-en.png  Views: 161  Size: 23.0 KB  ID: 515


And what you get in this mod is
Removed applications:

All removed applications have been rebuilt and signed.
Now they can be installed as normal applications:
from SD card or via "adb install". Get here: narod.ru, rapidshare.com
  • BluetoothIcon.apk
  • DivXRegCode.apk
  • Email.apk
  • Facebook1.1.2.apk
  • Gallery.apk
  • LatinIME.apk
  • LatinImeTutorial.apk
  • Layar304-final-market.apk
  • MetaMidpPlayer.apk
  • MidpPlayer.apk
  • MyFiles.apk
  • MySpace1.7.apk
  • VoiceRecorder.apk
  • VoiceSearch.apk
  • WifiIcon.apk
  • YouTube.apk
but app2sd is not ready yet see u tomorrow

then download do this
  1. Download '.zip' файл: LK2-02-1_update.zip
  2. Copy it as .zip file to root of SD card! (mount or with help adb)
  3. Download and extract Kernel: i5700_LK2-02_PDA.zip
  4. Use boot and ops you allready Download it
  5. Flash i5700_LK2-xx_PDA by Odin as PDA file as debug only.
  6. Kernel will flash and Spica reboot and enter in Recovery

after that you will see
Click image for larger version    Name: 1.png  Views: 829  Size: 60.6 KB  ID: 663

select "apply any zip from SD':
Click image for larger version    Name: 2.png  Views: 657  Size: 59.6 KB  ID: 664

select: LK2-xx_update.zip
press Ок + Home for confirm
Click image for larger version    Name: 3.png  Views: 685  Size: 21.0 KB  ID: 665

when you see "Install from sd card complete" press ОК for reboot.

Now we have

1. Full rebuils Spica Linux Kernel from Samsung sources, plus:
- full root in adb (you can use cp etc, not only cat)
- root - su+Superuser
- add Netfilter/iptables (Walldroid, Wifi Tether)
- support ext2/ext3/ext4
- cifs (smb - support windows network shares)
- squashfs (for recovery utils)

2. Recovery
- apply update.zip files (android install/update system)
- samdroid backup - create .tar file (system + data), restore via Odin
- wipe (data, cache, dalvik-cache)
- you can repartition your SD card on 2 partituions FAT32 + ext2 for install application os SD card apps2sd All your data on SD card will be delete!!!

3. Apps2sd based on CyanogenMod apps2sd
- you can move your applications from internal memory to SD card when you want, simple create two partitions on SD FAT32 + ext2/3/4

thank to samdroid.net

More

Samsung I5700 Galaxy Spica Android 2.1 Flashing Guide

original post

This is a complete guide to flash (upgrade) your Samsung I5700 Galaxy Spica to Android 2.1 (firmware EXXJCE (March 2010)). I have test it on my own Spica with firmware version DXIL1 and two of my friends with firmware version DXJA1 and it really worked. You can use this guide to upgrade your Spica at your own risk and don’t blame me if you turn out your Spica into a bricked device :-) .

What you need:


Before start checklist:

  • Check your firmware using *#1234#
  • Backup your data (contacts, sms, etc)
  • Ensure that your phone battery power is sufficient
  • Release the SIM lock (check SIM lock status using *#7465625#)
  • Extract all required files into a folder (those files will be: I570EXXJCE.zip –> I570EXXJCE.tar; Odin_v4.03_spica_jc3_ops.rar –> Odin Multi Downloader v4.03.exe, spica_jc3.ops; jb4_bootloader.rar –> I570EXXJA1_CLI32638_Bootloader.tar, I570XXJB4_Phone.tar; I570EOLBJB3-CSC-CL167487-OLB.tar).
  • Shutdown or disable Antivirus and Samsung PC Studio if any.

How to flash:

Preparation

  1. Shutdown your phone and remove the SIM Card and SDCard.
  2. Press volume down + power button + camera to put the phone into download mode.
  3. Spica Download Mode

    Spica Download Mode

  4. Connect the phone to PC using USB cable. You can check the connection in Windows device manager, make sure that your phone is properly detected by Windows like picture below
  5. Windows Device Manager

    Windows Device Manager

  6. Run the Odin Multi Download v4.03.exe. If your phone is properly detected, the Com Port Mapping field should be in yellow background.

Flash I

  1. Select spica_jc3.ops into Select OPS field
  2. Select I570EXXJCE.tar into Selet Integrate Package – Choose One Package Option field
  3. Tick the One Package option
  4. Click Start to start flashing. The timer and progress bar above COM Port Mapping field should start . If the progress bar doesn’t start but the timer continue to run , close Odin and disconnect the phone from PC. Remove and insert the battery and start the phone in download mode again, then run Odin.
  5. Wait until PASS message appear in Message box and the progress bar box turns into blue.
  6. At this step, you may get the flashing seems to be failed, and you’ll see exclamation mark appears like image shown below. Don’t worry, this is not the end of your spica, close the Odin and disconnect the phone from PC.
  7. Remove and insert the battery, start the phone in download mode then run Odin again and follow the steps in Flash II.
  8. Click to enlarge
    Click to enlarge

Flash II

  1. Keep spica_jc3.ops in Select OPS field.
  2. Click Reset Files to clear the fields.
  3. In Select Images to download panel, Select I570EXXJA1_CLI32638_Bootloader.tar into BOOT field,I570XXJB4_Phone.tar into PHONE field, I570EOLBJB3-CSC-CL167487-OLB.tar into CSA field, and let the PDAfield empty.
  4. In Debug Option panel, tick Debug Only and PDA Format option. Don’t tick One Package option in Option Panel.
  5. Click Start and watch the progress bar and timer, wait untill PASS message appear on Message box.
  6. Disconect the phone from PC, remove and insert the battery, start the phone in download mode again then continue to Flash III.
  7. Click to enlarge
    Click to enlarge

Flash III

  1. Keep spica_jc3.ops in Select OPS field.
  2. Click Reset Files to clean the fields.
  3. In Select Images to download panel, Select I570EXXJCE.tar into PDA field.
  4. If you get an error dialog, rename the I570EXXJCE.tar into I570EXXJCE_PDA.tar and insert into PDA field again.
  5. Don’t select One Package option and Debug Option.
  6. Click Start and watch the progress bar and timer, wait untill PASS message appear on Message box.
  7. The phone will restart and you will get the Eclair screen :-) .
  8. Click to enlarge

    Click to enlarge

Now you have the new Eclair in your Spica, but wait, firmare EXXJCE is french firmware, so you’ll get your Spica language in French, to change the language, enter paramètres menu at bottom corner then choose Paramètres de langue then Langue et règion and select your language.

Rooting Your New Eclair

In some cases, you may need your Spica to be rooted in order to install some applications like shootme, my favourite screen capture application. This is just optional, you don’t have to follow this step. I use LkMod v2.5.1 by Leshak that based on EXXJCE firmware to get my Spica rooted and get some additional features like live wallpaper and custom logo while booting my Spica.

LkMod 2.5.1 features:

  • New phone.apk (from xdadev)
  • Helixlauncher as default home (can be switched with default Pantheon)
  • Live wallpaper
  • Root (su)
  • Busybox
  • Remount
  • fdump for backup
  • Custom logo

What you need:

Create your custom logo (Optional)

Default logo comes with LkMod can be replaced with your own logo, you can replace the logo with your own using Photoshop or other image manipulating software.

How to change the logo:

  1. Install the GNU tar for windows, default location is on C:\Program Files\GnuWin32
  2. Extract LkMod-2_5_1-PDA.7z and you’ll get LkMod-2_5_1-PDA.tar
  3. Extract LkMod-2_5_1-PDA.tar and you’ll get four files: cache.rfs, datafs.rfs, logo.png and zImage.
  4. Create your own logo with 320×480 size and PNG file type. Warning: The size of logo file must be between 30-40 kb or the phone will never be able to boot!!.
  5. Save as logo.png and replace the default logo.png
  6. Package the four files using GNU tar command line program
  7. >C:\Program Files\GnuWin32\tar -cvf LkMod-2_5_1-PDA.tar cache.rfs datafs.rfs logo.png zImage

  8. You’ll get your own LkMod with your own custom logo (LkMod-2_5_1-PDA.tar)

How to flash

  1. Select spica_jc3.ops in Select OPS field.
  2. Click Reset Files to clean the fields.
  3. In Select Images to download panel, Select LkMod-2_5_1-PDA.tar into PDA field.
  4. Don’t select One Package option and Debug Option.
  5. Click Start and watch the progress bar and timer, wait untill PASS message appear on Message box.
  6. The phone will restart and you will get the rooted Eclair with helixlauncher default home.

Usefull information about Samsung Firmware

Europe
XA = Austria, France, Germany, Italy, Netherlands, Switzerland, UK
XB = Denmark, Norway, Sweden
XC = Portugal, Spain
XD = Croatia, Czech, Hungary, Slovakia
XE = Bulgaria, Estonia, Kazakhstan, Latvia, Lithuania, Russia, Ukraine
XF = Bulgaria, Croatia, Romania
XP = Dutch, French, Italian, Spanish, Dutch, Polski, Portuguese, Turkish
XW = UK, Italy, Germany, France, Australia, Netherlands, Belgium, Switzerland
XX = Austria, Belgium, France, Germany, Hungary, Italy, Spain, United Kingdom

Asia
DD = India
DX = Indonesia, Malaysia, Philippines, Singapore, Vietnam
ZC = China, Hong Kong
ZH = Hong Kong

Code = Year – Month
A = 2001 – January
B = 2002 – February
C = 2003 – March
D = 2004 – April
E = 2005 – May
F = 2006 – June
G = 2007 – July
H = 2008 – August
I = 2009 – September
J = 2010 – October
K = 2011 – Novermber
L = 2012 – December


More